Butterscotch Ice cream

A year ago, at a family friend’s get together, we all friends were discussing about ice creams. I happened to mention to them that recently I happened to try avocado ice cream. While the discussion was on, one of my friend’s expressed her wish to relish butterscotch ice cream. She told me that if ever you try butterscotch ice cream at home do let me know. I don’t mind driving to your house, for more than two long hours just to relish the ice cream, she said. She also mentioned that after coming to US, she tried many butterscotch ice cream but, non gave her that satisfaction that she got after she had any such ice cream back in India.

From that day onwards, it always ringed in my mind that I have to try out butterscotch ice cream for this friend of mine. I started exploring various recipes on the internet. Almost, all mentioned the use of butterscotch essence. But to my dismay, butterscotch essence I could not readily find in the US marts around me. I tried arranging it through friends travelling to and fro to India but in vain.

Finally we only had to plan a month-long India trip during which I bought the essence. As soon as I was back to US, I decided to try out the finalized recipe explored on YouTube by cookingshooking. I did accomplish my task and fulfilled my friend’s wish. She was delighted and just loved it. I am so happy 😊


Recipe :

Ingredients :

For the Praline :

  • 4 tbsp granulated sugar
  • 2 tbsp chopped cashew nuts
  • 1 tbsp unsalted butter
  • a greased metal plate

For the Ice cream :

  • 1 1/2 cup heavy whipping cream
  • 1/3-1/2 cup powdered or icing sugar (you can adjust the sugar as per your liking)
  • 1/2 cup milk
  • praline as desired
  • 1 1/2 tsp butterscotch essence
  • pinch yellow food color (optional)
  • airtight container to store the ice cream

Method :

  1. Place the bowl (in which you shall beat the cream) and the beater attachment in the freezer at least for half an hour.
  2. Heat a pan and once hot caramelize the sugar on low flame stirring continuously.
  3. Once caramelized, add the butter and nuts and mix well.
  4. Transfer it into the greased plate and spread it in a thin layer on the plate. Allow to cool.
  5. Once cooled, remove it by pressing the bottom of plate. Crush the praline into smaller chunks or powder.
  6. In cooled bowl, beat the whipping cream to stiff peaks.
  7. Once double in volume, add the sugar and beat further till well mixed.
  8. Then fold in the milk, essence,praline and food color till well incorporated. Reserve some praline for garnish.
  9. Pour the ice cream in an air tight container and garnish with remaining praline.
  10. Allow to set overnight. You can even serve the scoop sprinkling some praline over the scoop. You can also beat the ice cream midway while it is just about to set but not yet set and then allow it to set again. However this is optional.

Raw Mango Conserve / Amblechen God Lonche

Back in my homeland, as the summer season begins starts the season of stocking up food stuff, preserves, dry fish, spice powders, etc for the upcoming raining and winter seasons that follow the summers. Summers mark the availability of many fruits, one of which is the mangoes.

In our native language (Konkani) “Ambli” means raw baby mangoes while “God Lonche” means sweet pickle/preserve. This is very commonly made and preserved dish during the mango season in most of the Goan households. You can just eat it as is like dessert or serve it with chapati or roti (tortilla).


Recipe :

Ingredients :

  • 3 medium-sized raw baby mangoes, peeled and cubed or cut into small thin slices.
  • 10-15 green chillies, cut lengthwise ( adjust the number as per how spicy the chilies are)
  • 1 tsp mustard seeds
  • One 1/2 inch piece of Shankar chap hing or 1/4-1/2 tsp asafoetida
  • Around 500 g jaggery, grated
  • Salt as per taste

Method :

  1. In a small frying pan, dry roast the mustard seeds and hing. Once cooled, roughly powder them using mortar and pestle.
  2. In a saucepan, add the mango pieces, chillies and enough water such that the mango pieces are well covered.
  3. Cover and cook till the mango pieces are well cooked.
  4. Once cooked, strain the mango and chili pieces and keep aside.
  5. To the residue water, add the jaggery. Start with around 300 g jaggery and then keep increasing as per your sweetness requirement.
  6. Once the jaggery is well dissolved, add the mango pieces, chillies, salt as per taste and powdered mustard hing mix. Mix well.
  7. Cook uncovered till desired consistency is achieved. It should not be too runny nor too thick.
  8. Cool and store refrigerated in an air tight container. Bring conserve to room temperature prior to serving and enjoy with roti or chapati.

Strawberry shortcake trifle (eggless)

There is this Valentine’s day special contest being held on a food group on facebook from beginning of Feb to 12 Feb 2017. It asks you to prepare any dish but the main ingredient should be strawberry.

Me and my hubby we both look up to celebrate Valentine’s Day. We might not celebrate our birthdays or anniversaries but Valentine’s Day is something we look forward to to celebrate or to give each other unique gifts. I guess the reason for this is that we knew each other since college days.

I was excited to see the contest announcement but when I read the details further the main ingredient made me skeptical and I was reluctant to participate. A few days passed and my desire to participate was increasing but every time I gave it a thought I would step back thinking about “strawberry – main ingredient”. The reason is I personally don’t cherish strawberries 😏. And this being valentine’s special my husband I can say hates it. 🙄.

Giving this more thought I decided that I should try out something with strawberry that my hubby would at least dare to taste even when I tell him that it’s made using strawberries. And yes let me proudly tell you the attempt and of course the efforts were successful and paid off. He said ” If you had asked me to eat strawberries just like that I would not have eaten but this dessert that you have made is really good and liked it.” He almost ate half the glass much more than I expected.

While neighbor when I offered her she was like ” The sweetness is just perfect. Neither to sweet nor less sweet. It’s just right.” On the food group too, it was appreciated by multiple members. So now no matter I win or not, it is like I have already succeeded. The post with maximum number of likes will decide the winner. You actually cannot say that the number of likes are actually given based on the recipe or looks. Here person with good networking skills will stand a greater chances and his/her recipe might not even be read. Anyways the sweet words from my loved one’s and my well wishers mean a lot of encouragement and appreciation to me. ☺️


Recipe :

You will need less than 1 kg of strawberries for this entire recipe. Where ever I have used puree, there I have roughly chopped and pureed the strawberries in a blender, after which I have passed the puree through a sieve.

1 cup = 240 ml


Strawberry cake :

Ingredients:

  •  1/4 cup butter unsalted
  • 1 cup sweetened condensed milk (around half a tin)
  • 1/2 cup all-purpose flour
  • 1 tsp baking powder
  • 1/2 baking soda
  • 1/2 cup strawberry purée
  • 1/4 cup aerated water or club soda
  • 9×13 inch pan

Method :

  1. Beat butter with sweetened condensed milk.
  2. Sift all purpose flour, baking powder and baking soda into the beaten butter mix.
  3. Add strawberry puree. Beat further.
  4. Add aerated water or club soda and mix further till all is incorporated.
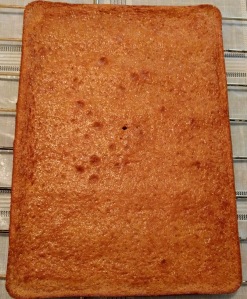
  5. Pour the mixture into a greased and floured sheet pan (9×13 inch) and bake it in an oven preheated at 350F for 30 mins or till done.
  6. Then allow the cake to completely cool on a cooling rack.


Strawberry sauce :

Ingredients:

  • 250 gms puréed strawberries.
  • 2 tbsp butter
  • 1 tbsp cornflour
  • 2-3 tbsp granulated sugar

Method:

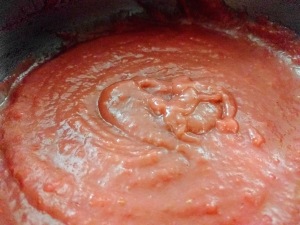
  1. In a saucepan, melt butter.
  2. In a bowl dilute cornflour in 2 tbsp of prepared puree.
  3. Mix granulated sugar in the butter alongwith the remaining puree.
  4.  Once it boils, stir in the cornflour mix and keep stirring for another 5 mins till well incorporated.
  5. Put off the flame and allow to cool.


Strawberry cream :

Ingredients :

  • 1/2 tsp gelatin
  • 2 tbsp cold water
  • 1 cup heavy whipping cream
  • 1/2 tsp pure vanilla extract
  • 3-4 tbsp confectionary sugar
  • 1/3 cup strawberry purée

Method :

  1. Prior to beginning with this cream preparation, keep the mixing bowl and whip in freezer for 15 mins to cool.
  2. Mix unflavored gelatin in cold water and allow to rest. This mix helps in stabilizing the cream.
  3. Then beat heavy whipping cream with vanilla extract until soft peaks are formed.
  4. Fold in confectionery sugar, strained gelatin mix and strawberry puree and beat again till stiff peaks are formed.


Assembly :

  1. You can use a serving dish or individual dessert cups for the assembly.
  2. Chop and slice few strawberries.
  3. I used a round cookie cutter to cut circular cake discs. I could get around 12 discs.
  4. Take a glass. Spread a layer of cream, then a layer of chopped strawberries followed by layer of sauce and then cake followed by a layer of cream.
  5. You can either stop here and garnish with strawberry slices or you can repeat another stack as shown in picture with chopped strawberries, sauce, cake and again cream. The final layer always needs to be cream just before garnish.
  6. Single stack prepares 12 serves while if double stack is set up prepares 6 serves.

Classic rum cake 

We were at a get together at our relative’s place. While talking about cuisines and various dishes, suddenly all were nostalgic about a rum cake which our aunt Usha Naik (family friend)  had baked and relished by all for some party in the past. As we had recently moved here, we were not obliged to relish it ☹️.

However, I was very eager to get hold of the recipe and try it out. Christmas was around the corner and I was planning to try it out then. So I grabbed the recipe from aunt Usha and was all ready with the ingredients in my pantry. But to my dismay my hubby was in no mood for any more cakes that month as be already had consumed our wedding anniversary cake by mid December.

I was just waiting for an occasion to seek an opportunity to bake it. Recently was my paternal grand dad’s 100th birthday remembrance. So I didn’t wait at all and just decided to try it out no matter what. My grand dad too was a foodie even at his old age. Though he was a doctor himself and health conscious, he did not give up on relishing delicious food.

Thanks Usha aunty for the recipe. We and many of our friends enjoyed the yummy cake. Let’s begin with the recipe. I have done very minor changes to the original.


Recipe :

Ingredients:

For the cake –

  • 1/2 cup chopped walnuts
  • 1 box yellow cake mix (The recipe asked to use 18 1/2 oz box however I used the gluten free pack by Pillsbury 17 oz. You can use the regular packs of traditional yellow cake mix of 15.25 oz which would work well)
  • 1 box instant pudding and pie filling (3.4 oz)
  • 4 eggs
  • 1/2 cup cold water
  • 1/2 cup vegetable oil
  • 1/2 cup rum

For the rum glaze –

  • 1/2 cup butter ( 1 stick or 1/4 pound)
  • 1 cup granulated sugar
  • 1/4 cup water
  • 1/2 cup rum

Method :

  1. Preheat the oven to 325 F.
  2. Grease and flour a 10 inch tube pan or 12 cup bundt pan.
  3. Sprinkle about 1/4 cup or less walnuts at the bottom of the pan.
  4. Mix all the rest ingredients and then fold in the remaining walnuts.
  5. Pour the mix into the greased pan and bake in the preheated oven for an hour or till cake doneness.
  6. Remove the cake and allow it to cool completely on a cooling rack.
  7. For the glaze, melt the butter in a saucepan.
  8. Stir in the sugar and water and continue stirring till sugar dissolves.
  9. Allow to boil for 5 mins and then remove from heat.
  10. Stir in the rum.
  11. Drizzle and smooth the glaze over the top and sides of the cake.
  12. Allow the cake to absorb the glaze completely and then repeat till the entire glaze is used up.

Banana Loaf

This recipe is passed on to me by my mum. It’s nothing but sooji halwa or semolina dessert in cake or loaf form. I have always relished this since my childhood. So would like to share it with you.


Recipe :

Ingredients :

  • 2 – 3 medium-sized bananas
  • 1 tbsp ghee/ clarified butter
  • 1 cup semolina (sooji)
  • 3/4 cup granulated sugar
  • 3/4 cup milk
  • 1/4 tsp cardamom powder
  • 1/4 tsp baking powder
  • salt as per taste

Method :

  1. Heat ghee in a pan. Once hot, roast the semolina till slightly roasted but take care it doesn’t turn brown.
  2. In a mixie, mash banana with sugar.
  3. Once the semolina is cooled, add the mashed banana sugar mix into the roasted semolina.
  4. Try to remove the left over banana mix from blender blending the milk. Then add this milk into the semolina.
  5. Now add the cardamom powder, baking powder and salt and mix well.
  6. Grease a loaf pan and pour the contents into it.
  7. Bake this in an oven preheated at 350 F for around 25-30 mins or till a skewer inserted in the center comes out clean.
  8. Enjoy the cake for dessert or snack time.

Shahi Tukda

Just as the name suggests it’s very “Shahi” – royal in taste and texture. It comprises of a toasted bread slice soaked in sugar syrup and served with slightly thick creamy sauce and garnished with chopped nuts.

The dish comprises of 3 parts : 1) preparing the toasted bread slices, 2) preparation of sugar syrup, 3) preparation of the thick creamy milky sauce – Rabdi. Traditionally, in the first step the bread slices are deep fried, preferably in ghee. However, now that we are becoming so much health conscious and it is also the need of the hour, we can plainly toast them in a pop up toaster or can also toast them in a conventional oven after slightly buttering them. I have tried both ways. For the third and last step, you can either do it from scratch by boiling milk and reducing it to half or also use store bought rabdi mix. Again I have tried both. For the second option, I have tried rabdi mix by Gits. Whenever you make the rabdi you should take care to make it just sweet or slightly sweet. If it becomes too sweet, then when you serve the sugar soaked toasted bread slices, the entire dessert will taste drastically sweet. So the sweetness of rabdi should be such that when served along with the sugar soaked toasted bread slices, the dessert should taste just right.


Recipe :

Ingredients:

  • 12 bread slices
  • Butter/ ghee
  • 1 cup granulated sugar
  • 1 cup water
  • Few strands of kesar
  • 500 ml whole milk
  • 1/2 cup granulated sugar
  • 1/4 tsp cardamom powder
  • Slivered nuts like cashew, pistachios, almonds

Method :

  1. We need to discard the edges of the bread slices. For that you can cut the slices into circles using a bowl with sharp edges or into squares or triangles. In the picture I have cut them into circles. But when you have less slices than the number of guests you can cut each into two triangles or four squares.
  2. Apply little butter/ghee on either side of the bread slice. Toast them for 8-10 minutes by flipping them mid way in an oven preheated at 180 C. They need to be toasted well and be slightly browned.
  3. In a thick bottomed non stick pan, heat 1 cup sugar with 1 cup water stirring continuously till the sugar dissolves completely. Then add the kesar strands and continue to boil till the sugar syrup thickens to single strand consistency.
  4. Allow it to cool slightly. Then soak the toasted bread slices into the sugar syrup for around 5 mins flipping in between. Set them aside.
  5. In a non stick pan, boil the milk and continue to boil till it is reduced to half the quantity. Then add the sugar and cardamom powder.
  6. You can boil it further till it thickens and reaches your desired consistency.
  7. Allow it to cool.
  8. While serving serve it cold, by pouring a spoonful of rabdi over the sugar soaked toasted bread slice and garnish with slivered nuts.

Ribbon Cake

Cakes have always been one of my favorite desserts or snack and being passionate about baking I always like to experiment with a variety of baked goodies.

As a child I always waited for the Christmas season to arrive or looked forward towards an invite at a Christian family’s home for a birthday party,etc. I know it sounds insane. But kids are kids, innocent at heart.

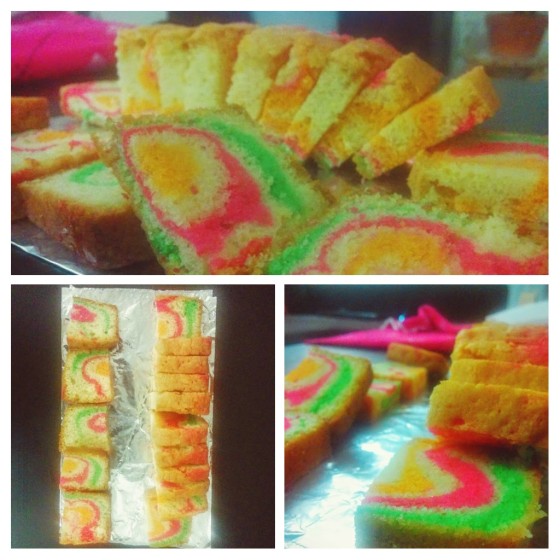
As a child I always had this fascination towards the ribbon cake. At that time, the exact type or name of the cake was so immaterial to me. Rather I would always describe the cake to my parents or the shopkeeper to get what I desired. I would just say a “cake whose slice has pink or green or both color bands on it.”As a college girl too, I remember I used to buy the ribbon cake, quarter kg from the Apollo bakery in Ponda.

A few days back Ms.Xanti Pinto posted ribbon cake pictures on a food group (Base Recipe by Xanti). I was so damn delighted to see those. It was also my mum’s birthday that day. So I thought I should be seeking the recipe from her as soon as possible and baking one at once so that though seven seas away from mum can celebrate her birthday as well re-live my childhood. However I could not get the recipe in time.

But as Children’s Day (14 November is celebrated as Children’s day in India – my home country) was round the corner, what better day than this one to re-live my childhood. So taking Xanti’s recipe as base and making a few modifications to it, here we go ahead to bake the Ribbon cake.

img-20161113-wa0003

Recipe :

Ingredients :

  • 1 cup all-purpose flour
  • 1 tsp baking powder
  • pinch of salt
  • 1 stick unsalted butter, at room temperature, cut into cubes
  • 3/4 cup granulated sugar (you can adjust the sugar based on the sweetness you prefer)
  • 2 large eggs, at room temperature
  • 1 tsp vanilla extract
  • 9 inch loaf pan
  • gel or tube colors (pink, green and orange)

Note : Incase you are using salted butter, please omit using the salt

Method :

  1. Pre-heat the oven to 320 F.
  2. Grease a 9 inch loaf pan and line it with parchment paper.
  3. In a bowl, sift the all-purpose flour, salt and baking powder.
  4. In a mixing bowl, beat the butter and sugar  till light and fluffy using a hand mixer.
  5. Add one egg at a time and beat the batter further.
  6. Add the vanilla extract and mix well.
  7. Now fold in the flour mixture into the wet ingredients until well incorporated and a smooth lump-free batter is achieved.
  8. Take 3 bowls and spoon a tbsp of the batter in each of these bowls and retain the rest.
  9. In each bowl mix each of the gel colors. so now you have vanilla batter, a little of orange, pink and green batter
  10. Spread a smooth layer of vanilla batter at the base of the loaf pan.
  11. On top of this, pour one of the colored batter. Smooth this out like a color band, however you need not spread it as a layer.(It also wont be sufficient to spread as a layer).
  12. Repeat till rest of the colored and vanilla batters are consumed, alternating each. Remember that you have to spread only the vanilla batter as a layer.
  13. Finally smooth out the surface and tap the pan against the counter top to get rid of any air bubbles.
  14. Bake the loaf for 45-60mins or till a toothpick inserted in the center of the cake comes out clean.
  15. Remove the cake on a cooling rack and allow to cool down for 10 mins.
  16. Cut the cake into slices. Happy Children’s Day. Enjoy!

20161113_001048-COLLAGE.jpg

Badam Katli/Almond Fudge

The festival of Diwali could not be celebrated without the preparation of the sweet – burfi or katli. Kaju Katli or Cashewnut fudge is considered to be an expensive sweet but still is quite common as people don’t hesitate. So I thought of making something different than regular. Katli means a thin square or diamond shape piece of sweet.

img_20161027_185352

Recipe :

Ingredients :

  • 1/2 tin condensed or sweetened milk
  • 1/2 cup almond meal or flour
  • 1 tbsp ghee pr butter
  • 1/4 tsp cardamom powder
  • slivers of almond for garnish
  • Aluminium foil or parchment paper for rolling
  • butter/ghee for greasing

Method :

  1. In a non-stick pan, heat the ghee. Mix sweetened milk, almond flour and cardomom powder.
  2. On a low flame continue stirring till the mixture starts leaving the sides of the pan and comes together as a single lump. Switch off the heat.
  3. Grease two sheets of aluminium foil or parchment paper.
  4. Spread the cooked lump on one of the greased sheets and then placing the other greased sheet on top of it, roll into a 1/4-1/2  inch sheet.
  5. Allow it to dry a bit. Then using a pizza cutter or a knife, cut diamond shaped or square pieces. You can also use cookie cutter of desired shape to cut out the barfi
  6. Badam katli is ready to be relished.


20161027_185717-COLLAGE.jpg

Bombay Ice Halwa/ Mahim Halwa

I have childhood memories associated with Mahim Halwa. My uncle stayed in Mumbai and whenever he came down with his family to our place during summer vacation, he got this halwa from the famous sweet mart D’ Damodar.

We always relished it the store-bought one’s. I never imagined that it was simple enough to be prepared at home. While exploring various posts on a food group on Facebook, I came across this recipe posted by blogger Smruti Ashar-Shah presenting the Bombay Ice Halwa (Base recipe by Shruti). I was so damn amazed. That very moment I decided, I definitely need to give this a try.

And like they say “Where there is will there is a way”, my determination to prepare it gave me good results in first attempt. I think many would be interested to know this recipe and would be willing to give it a try at least once. So here goes the recipe. I shall definitely work towards capturing detail step by step pictures when I try this recipe for second time as it will be easy to understand and follow.

IMG_20161027_095834.jpg

Recipe :

Ingredients :

  • 1/2 cup butter or ghee
  • 1/2 cup all-purpose flour
  • 1/2 cup milk
  • 1 cup granulated sugar
  • few saffron strands
  • yellow food color (optional)
  • ghee/butter for greasing
  • aluminium foil/parchment paper/plastic
  • slivers of almonds, pistachios
  • 1 tsp of seeds from cardamom pods

Method :

  1. Grease a long sheet of aluminium foil using ghee or butter.
  2. In a non-stick pan, melt the ghee or butter completely.
  3. To this add the all-purpose flour, milk and sugar. Mix well.
  4. Keep stirring continuously and then add the saffron strands and color.
  5. You need to stir continuously till the desired consistency is achieved. The desired consistency can be judged by spreading a tsp of the mixture on the greased foil. If the mixture sets in 3-4 mins, then it implies that the mixture has reached the desired consistency and requires no more cooking.
  6. Put off the gas and pour the mixture on the greased foil and spread.
  7. Put a greased parchment paper sheet or plastic on top of the mixture and roll into a thin sheet of 1/8-1/4 inch thick.
  8. Remove the parchment/plastic and sprinkle the mix of almonds, pistachios slivers and cardamom seeds.
  9. Put the parchment/plastic back again and roll over again so that the garnish is firmly embedded in.
  10. Allow it to set. It takes quite some long time to set. As per the blog recipe I referred the author mentioned that it takes 4-6 hours which can vary based on the climate of the place. However, I had to keep it overnight for setting.
  11. Once its set, you cut it into squares or rectangles using a pizza cutter. You can also use cookie cutters to cut out the halwa in desired shapes.
  12. Store in an air tight container separating each piece of halwa from the other using a parchment piece.


20161027_100146-collage

Sweetened Coconut ladoo/balls

Diwali is round the corner. I wanted to prepare some sweets and snacks but some thing different from the traditional one’s. We – my husband and me, we dont like ladoos much, specially the traditional one’s. However, on some food groups members had been posting coconut ladoos which seem to be really tempting.

So I too decided to try making these ladoos and they turned out to be really delicious and yummy.

img-20161026-wa0029

Recipe :

Ingredients :

  • 1/2 tin sweetened milk (around 200 ml)
  • 2 cups desicated coconut
  • 1/2 cup milk powder
  • 1/4 cup desicated coconut for garnish
  • cupcake liners
  • oil

Method :

  1. In a non-stick pan, mix all the ingredientson a low flame.
  2. Keeping stirring so that the mixture does not get burnt and continue till the mix comes together as a lump.
  3. Pu off the flame. Apply oil to your palms.
  4. Take little amount of the mixture lump and roll between your palms to shape into a smooth golf size ball.
  5. Roll this ball into the desicated coconut and place into a cupcake liner.


20161026_215346-collage